Hello, everyone!
In this post, we’ll look at how to upload files in a Node.js application using Express, Multer, and TypeScript. We’ll go through the prerequisites, setting up your Node.js app with TypeScript, adding controllers and routes, integrating Multer to handle file uploads, and finally, connecting it all to a template.
Note: The GitHub repository for this project, including all the code, will be provided below.
Let’s get started!
Prerequisites
For this tutorial, make sure you have the following set up:
- Node.js in your environment. If you don’t have it installed, you can download it here.
- VS Code as your IDE (or an IDE of your choice). You can download it here.
Note: Familiarity with Multer for handling file uploads and TypeScript for adding static types to JavaScript is recommended.
Setting Up the App
In this section, we’ll create the initial folder structure for our application and set up our project dependencies. We’ll be using npm to manage dependencies, but you can also use Yarn if you prefer.
- Create the project folderFirst, open your terminal, navigate to your desired directory, and run the following commands to create and enter the project folder:
mkdir file-upload-app cd file-upload-app - Initialize the projectNext, initialize the project with npm (or Yarn if that’s your preference). This will create a
package.jsonfile to manage dependencies for our project. To initialize with npm, run:npm init -yThis command will create a
package.jsonfile with default settings, which we’ll modify as we add more dependencies. - Install project dependenciesNow, let’s install the required dependencies: Express, Multer, and their corresponding types for TypeScript. Run the following command:
npm install express multer
npm install --save-dev @types/express @types/multer typescript ts-node
This will install Express and Multer as regular dependencies, and the type definitions for Express, Multer, and TypeScript as dev dependencies.
Project Structure
To give you an overview of how the app will be structured, here’s what our folder layout will look like:
└── file-upload-app/
		│
		├── src/
		│   ├── index.ts
		│   ├── routes/
		│   │   └── fileRoute.ts
		│   └── controllers/
		│       └── fileController.ts
		│
		├── node_modules/
		├── package.json
		├── tsconfig.json
		└── package-lock.json
In this structure:
- The
src/folder will contain all of our TypeScript code. index.tswill be the entry point to our application.- The
routes/folder will store our route files, and thefileRoute.tsfile will handle the routing for file uploads. - The
controllers/folder will contain our controller files, such asfileController.ts, where the logic for file handling will reside.
Setting Up TypeScript
Now, let’s set up TypeScript for the project. To do this, we need to configure the tsconfig.json file, which will define how TypeScript compiles our code.
- Create the
tsconfig.jsonfileRun the following command to create the TypeScript configuration file:npx tsc --init - Configure the
tsconfig.jsonOpen the generatedtsconfig.jsonfile and update it to the following settings to properly handle the TypeScript compilation for this project:{ "compilerOptions": { "target": "ES6", "module": "commonjs", "strict": true, "esModuleInterop": true, "skipLibCheck": true, "forceConsistentCasingInFileNames": true, "outDir": "./dist", "rootDir": "./src" }, "include": ["src/**/*"], "exclude": ["node_modules"] }"target": "ES6"ensures that the JavaScript output is compatible with modern environments."module": "commonjs"is the module system used by Node.js."outDir": "./dist"specifies the folder where compiled JavaScript files will be stored."rootDir": "./src"defines where the TypeScript source files are located.
Optional Bonus: Setting Up Nodemon
To make the development process easier, you can set up Nodemon to automatically restart the server whenever there are changes to the source files.
- Install Nodemon as a dev dependency:
npm install --save-dev nodemon - Update
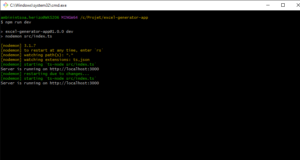
package.jsonscriptsAdd a script to thepackage.jsonfile to run the app with Nodemon. Modify the"scripts"section as follows:"scripts": { "dev": "nodemon src/index.ts", "start": "ts-node src/index.ts" } - Running the app with NodemonNow, you can run the app with:
npm run devThis will start the app and automatically restart the server whenever you modify the TypeScript files.
Setting Up the Folder Structure and Files
In this part, we’re going to set up the folder structure and create the necessary files. We’ll configure the main index.ts file, set up routes in the fileRoute.ts file, and handle the upload logic in the fileController.ts file. Here’s how each file should look:
1. src/controllers/fileController.ts
This controller will handle the logic for file uploads. We’ll create a function uploadFile to manage file uploads.
import { Request, Response } from 'express';
import fs from 'fs';
import path from 'path';

export const uploadFile = (req: Request, res: Response): void => {
    if (!req.file) {
        res.status(400).send('No file uploaded.');
        return;
    }

    const filePath = path.join(__dirname, '../../', req.file.path);

    // Set headers for file streaming
    res.setHeader('Content-Type', req.file.mimetype);
    res.setHeader('Content-Disposition', `attachment; filename="${req.file.originalname}"`);

    // Stream the file to the response
    const fileStream = fs.createReadStream(filePath);
    fileStream.pipe(res);

    fileStream.on('error', (error) => {
        console.error('File streaming error:', error);
        res.status(500).send('Error streaming the file.');
    });
};
Explanation:
- File Path: We use
path.join(__dirname, '../../', req.file.path)to locate the uploaded file based on thedestspecified in Multer. - Headers: We set
Content-Typeto the file’s MIME type andContent-Dispositionto allow the client to download the file with its original name. - Streaming: We create a readable stream with
fs.createReadStreamand pipe it to the response. - Error Handling: An error listener is added to handle any issues during streaming.
2.
src/routes/fileRoute.tsThis route file will define the endpoint for handling file uploads.
import express from 'express';
import multer from 'multer';
import { uploadFile } from '../controllers/fileController';

const router = express.Router();
const upload = multer({ dest: 'uploads/' });

router.post('/upload', upload.single('file'), uploadFile);

export default router;
In this file:
- We use Multer to handle file uploads. The
dest: 'uploads/'option specifies where uploaded files will be stored. - The
upload.single('file')middleware is configured to handle a single file upload with the field namefile.
3.
src/index.tsThis is the main entry point for your app, where you’ll set up the Express server and include the routes.
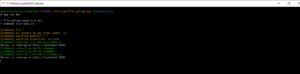
import express, { Application } from 'express';
import fileRoute from './routes/fileRoute';

const app: Application = express();
const PORT = process.env.PORT || 3000;

app.use(express.json());
app.use('/api', fileRoute);

app.listen(PORT, () => {
    console.log(`Server is running on <http://localhost>:${PORT}`);
});
Here:
- We import and configure Express.
- fileRoute is added to handle requests under the
/apipath. - The server listens on the specified
PORT, with a default of 3000 if no environment variable is set.
This setup provides a basic structure where:
fileController.tshandles the upload logic.fileRoute.tsdefines the route for file uploads.index.tssets up and runs the server.
- We use Multer to handle file uploads. The
Testing the App
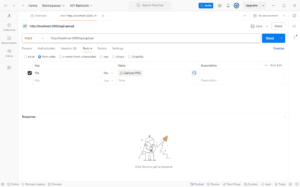
To test the app at this stage, you can use Postman or other API testing tools like Insomnia or Hoppscotch.
- Clone the GitHub repositoryYou can find the complete project setup on GitHub: GitHub Repository.
git clone https://github.com/dev-luckymhz/upload-file-node.js-typescript.git cd upload-file-node.js-typescript npm install npm run dev - Testing with Postman (or alternative tools)
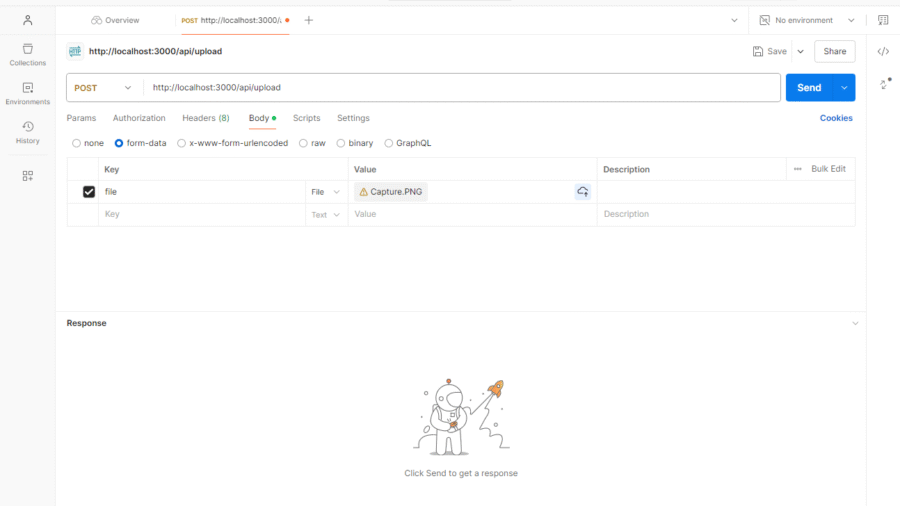
- Open Postman or your preferred API testing tool.
- Send a
POSTrequest tohttp://localhost:3000/api/uploadwith form data. - Add a file with the key
fileand choose any file to upload.
If the setup is correct, the app should respond with the file data, or return it as a stream if you configured it that way in the controller.
Integrating EJS (Optional)
To add a template to your app using EJS, you need to configure Express to use EJS as the view engine and set up the appropriate folder for views. Here’s how you can do that:
- Install EJS:
npm install ejs - Update
src/index.tsto include EJS:Here’s how you set EJS as the view engine in yourindex.tsfile:import express, { Application } from 'express'; import path from 'path'; import fileRoute from './routes/fileRoute'; const app: Application = express(); const PORT = process.env.PORT || 3000; // Set EJS as the view engine app.set("view engine", "ejs"); app.set('views', path.join(__dirname, '/views')); app.use(express.json()); app.use('/api', fileRoute); // Serve the upload form app.get('/', (req, res) => { res.render('uploadForm'); }); app.listen(PORT, () => { console.log(`Server is running on <http://localhost>:${PORT}`); });
Updated Project Structure
Your updated project structure with the views folder for the EJS templates will look like this:
file-upload-app/
│
├── src/
│   ├── index.ts
│   ├── routes/
│   │   └── fileRoute.ts
│   ├── controllers/
│   │   └── fileController.ts
│   └── views/
│       └── uploadForm.ejs
│
├── node_modules/
├── package.json
├── tsconfig.json
└── package-lock.json
Creating the EJS Form
In the views folder, create a file called uploadForm.ejs with the following content. This will be a Bootstrap-style form for uploading files:
<!DOCTYPE html>
<html lang="en">
<head>
    <meta charset="UTF-8">
    <meta name="viewport" content="width=device-width, initial-scale=1.0">
    <title>Upload File</title>
    <link href="<https://cdn.jsdelivr.net/npm/bootstrap@5.3.0/dist/css/bootstrap.min.css>" rel="stylesheet">
</head>
<body>
    <div class="container mt-5">
        <div class="card">
            <div class="card-header">
                <h3>Upload a File</h3>
            </div>
            <div class="card-body">
                <form id="uploadForm" enctype="multipart/form-data">
                    <div class="mb-3">
                        <label for="file" class="form-label">Choose File</label>
                        <input type="file" class="form-control" id="file" name="file" required>
                    </div>
                    <button type="submit" class="btn btn-primary">Upload</button>
                </form>
            </div>
        </div>
    </div>

    <!-- Modal to display the uploaded file -->
    <div class="modal fade" id="fileModal" tabindex="-1" aria-labelledby="fileModalLabel" aria-hidden="true">
        <div class="modal-dialog modal-lg">
            <div class="modal-content">
                <div class="modal-header">
                    <h5 class="modal-title" id="fileModalLabel">Uploaded File</h5>
                    <button type="button" class="btn-close" data-bs-dismiss="modal" aria-label="Close"></button>
                </div>
                <div class="modal-body">
                    <iframe id="fileFrame" width="100%" height="400px"></iframe>
                </div>
            </div>
        </div>
    </div>

    <script src="<https://cdn.jsdelivr.net/npm/bootstrap@5.3.0/dist/js/bootstrap.bundle.min.js>"></script>
    <script>
        document.getElementById('uploadForm').addEventListener('submit', async function(event) {
            event.preventDefault();

            const formData = new FormData();
            formData.append('file', document.getElementById('file').files[0]);

            const response = await fetch('/api/upload', {
                method: 'POST',
                body: formData
            });

            if (response.ok) {
                const fileBlob = await response.blob();
                const fileURL = URL.createObjectURL(fileBlob);

                // Show the uploaded file in the modal
                const fileFrame = document.getElementById('fileFrame');
                fileFrame.src = fileURL;
                const fileModal = new bootstrap.Modal(document.getElementById('fileModal'));
                fileModal.show();
            } else {
                alert('File upload failed!');
            }
        });
    </script>
</body>
</html>
Explanation:
- Form: This is a simple file upload form using Bootstrap. It includes an input field for selecting a file and a submit button.
- Modal: After a successful upload, a modal is shown containing an
<iframe>where the uploaded file is streamed and displayed. - JavaScript: Handles form submission asynchronously using the Fetch API. Upon successful upload, the file is displayed inside the modal.